
Background
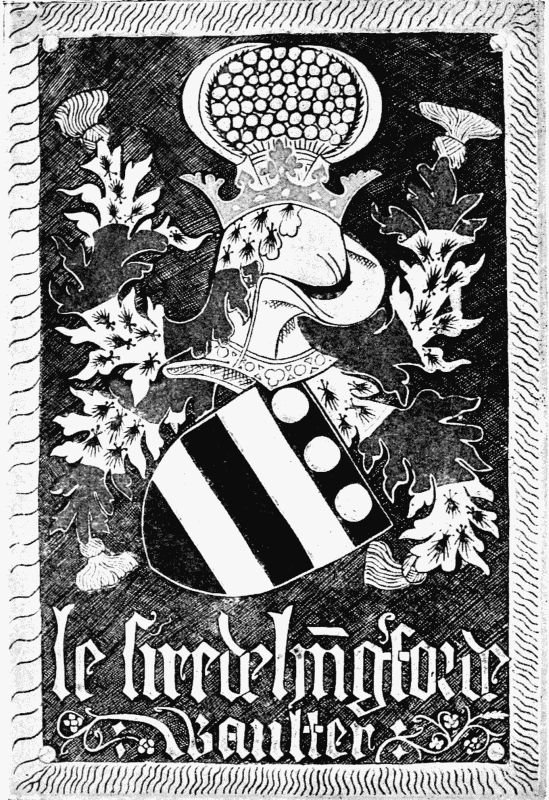
Fig. 136
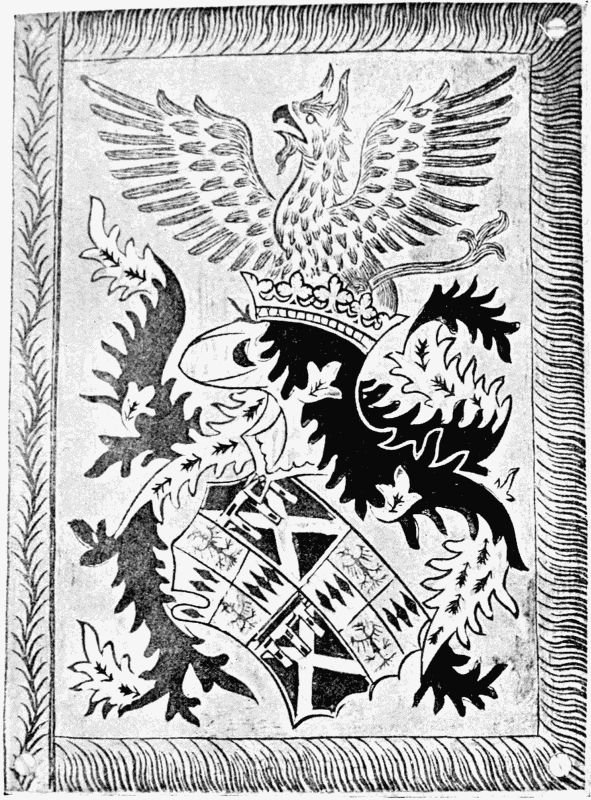
Fig. 137
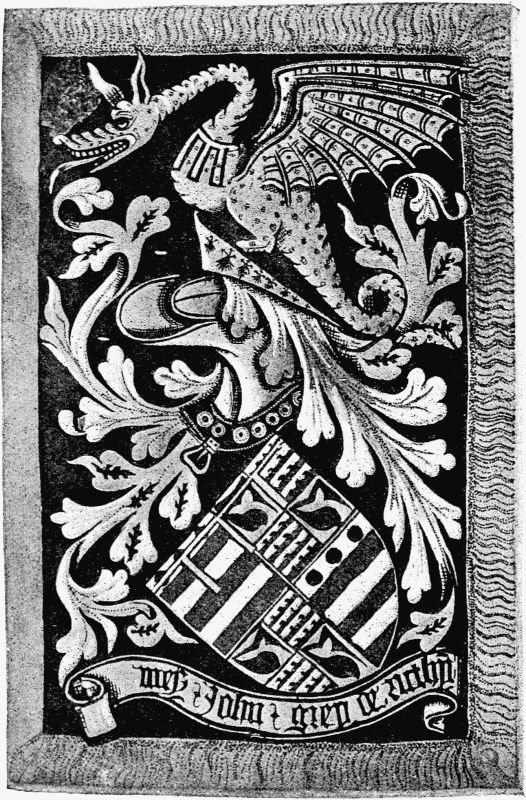
Fig. 138
One of the first books I ever owned concerning heraldry was William Henry St. John Hope’s “Heraldry for Craftsmen and Designers.” It’s a fantastic reference, and I recommend that everyone get a copy. The book contains the following passage:
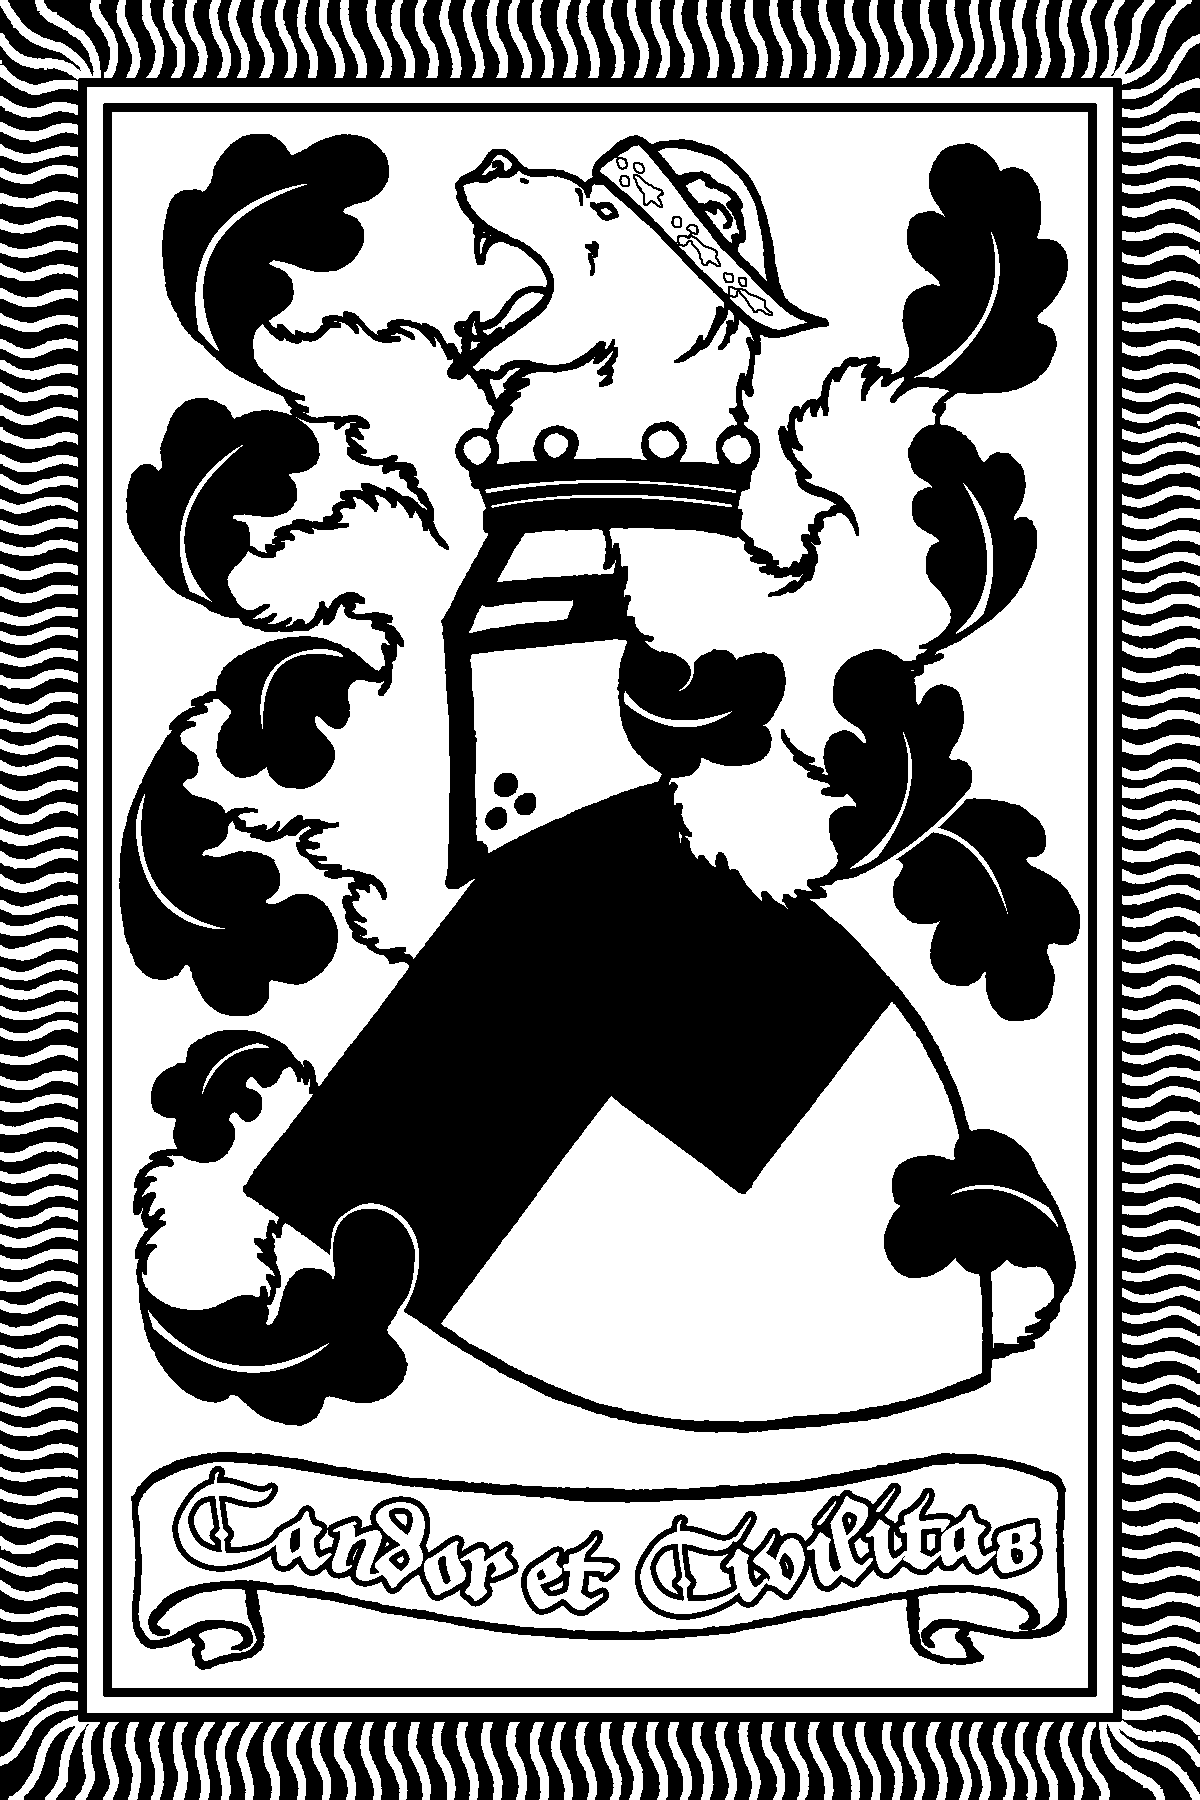
Examples are not lacking, even in the fifteenth century, of banners charged with regular heraldic achievements instead of arms, and quite an interesting series may be found among the Windsor stall-plates. Two small oblong plates of Sir Peter Courtenay and Henry lord FitzHugh are practically complete banners of their arms, but Walter lord Hungerford (after 1426) displays his arms, with helm, crest, and mantling, upon a dull black banner with fringed gold border attached to a writhen gilded staff (fig. 136). Richard Nevill earl of Salisbury (c. 1436) (fig. 137), John earl of Shrewsbury (c. 1453), John lord Tiptoft (c. 1461), and several others have their arms, etc. on plain gold-coloured fringed banners, but Richard lord Rivers (c. 1450), Thomas lord Stanley (c. 1459), and George duke of Clarence (c. 1461) have the field worked all over with decorative scroll-work. Sir John Grey of Ruthin (c. 1439) also displays his arms on an undoubted banner with black ground and gold fringe and staff (fig. 138), and William lord Fauconberg (c. 1440) on a banner with the field bendy of blue and silver, with a gold fringe and staff. It is not improbable that several other quadrangular stall-plates with coloured grounds represent banners.
(Hope, 229)
While the suggestion of a banner with a full achievement, rather than just the arms, was what initially intrigued me about this passage, unfortunately I’ve found no evidence outside of extant stall plates to suggest that actual banners displayed anything other than arms in period.
However, the more I researched stall plates, the more intriguing I found them. Hope supplies fourteen examples (the three seen above stylized like banners, while others are solid plates or cut-outs), and others may be found online or in heraldic resource texts.
As I read about stall plates, I decided that I had to have one. The ones I admired most were brass or bronze, etched and/or engraved and enameled. No one was making these in Caid, and most people had never even heard of them. I knew what I had to learn. What you see below is the result of months of trial and error to learn the first half of the project: brass etching.
If there’s one thing I’ve learned in my research and experiments, it’s that there’s no one true way to etch brass, so I’m writing down the process that works best for me. I’m indebted to the numerous existing online tutorials, many from the Steampunk community. My first couple of attempts followed the tutorial at the Steampunk Workshop; while I was unable to get my setup for electrolytic etching to do more than discolor the brass, I learned a lot about transferring laserjet toner. I also owe a great deal to the numerous metalworkers in the SCA who gave helpful advice and guidance, including Master Thomas Brownwell, Mistress Katrei Grunenberg, Master Thorkell Sigurdson, Countess Jane Corwin, and Count Angelo Cavelli. Finally, my thanks go to Master Bruce Draconarius of Mistholme, who supplied several resources on stall plates themselves.
Artwork:
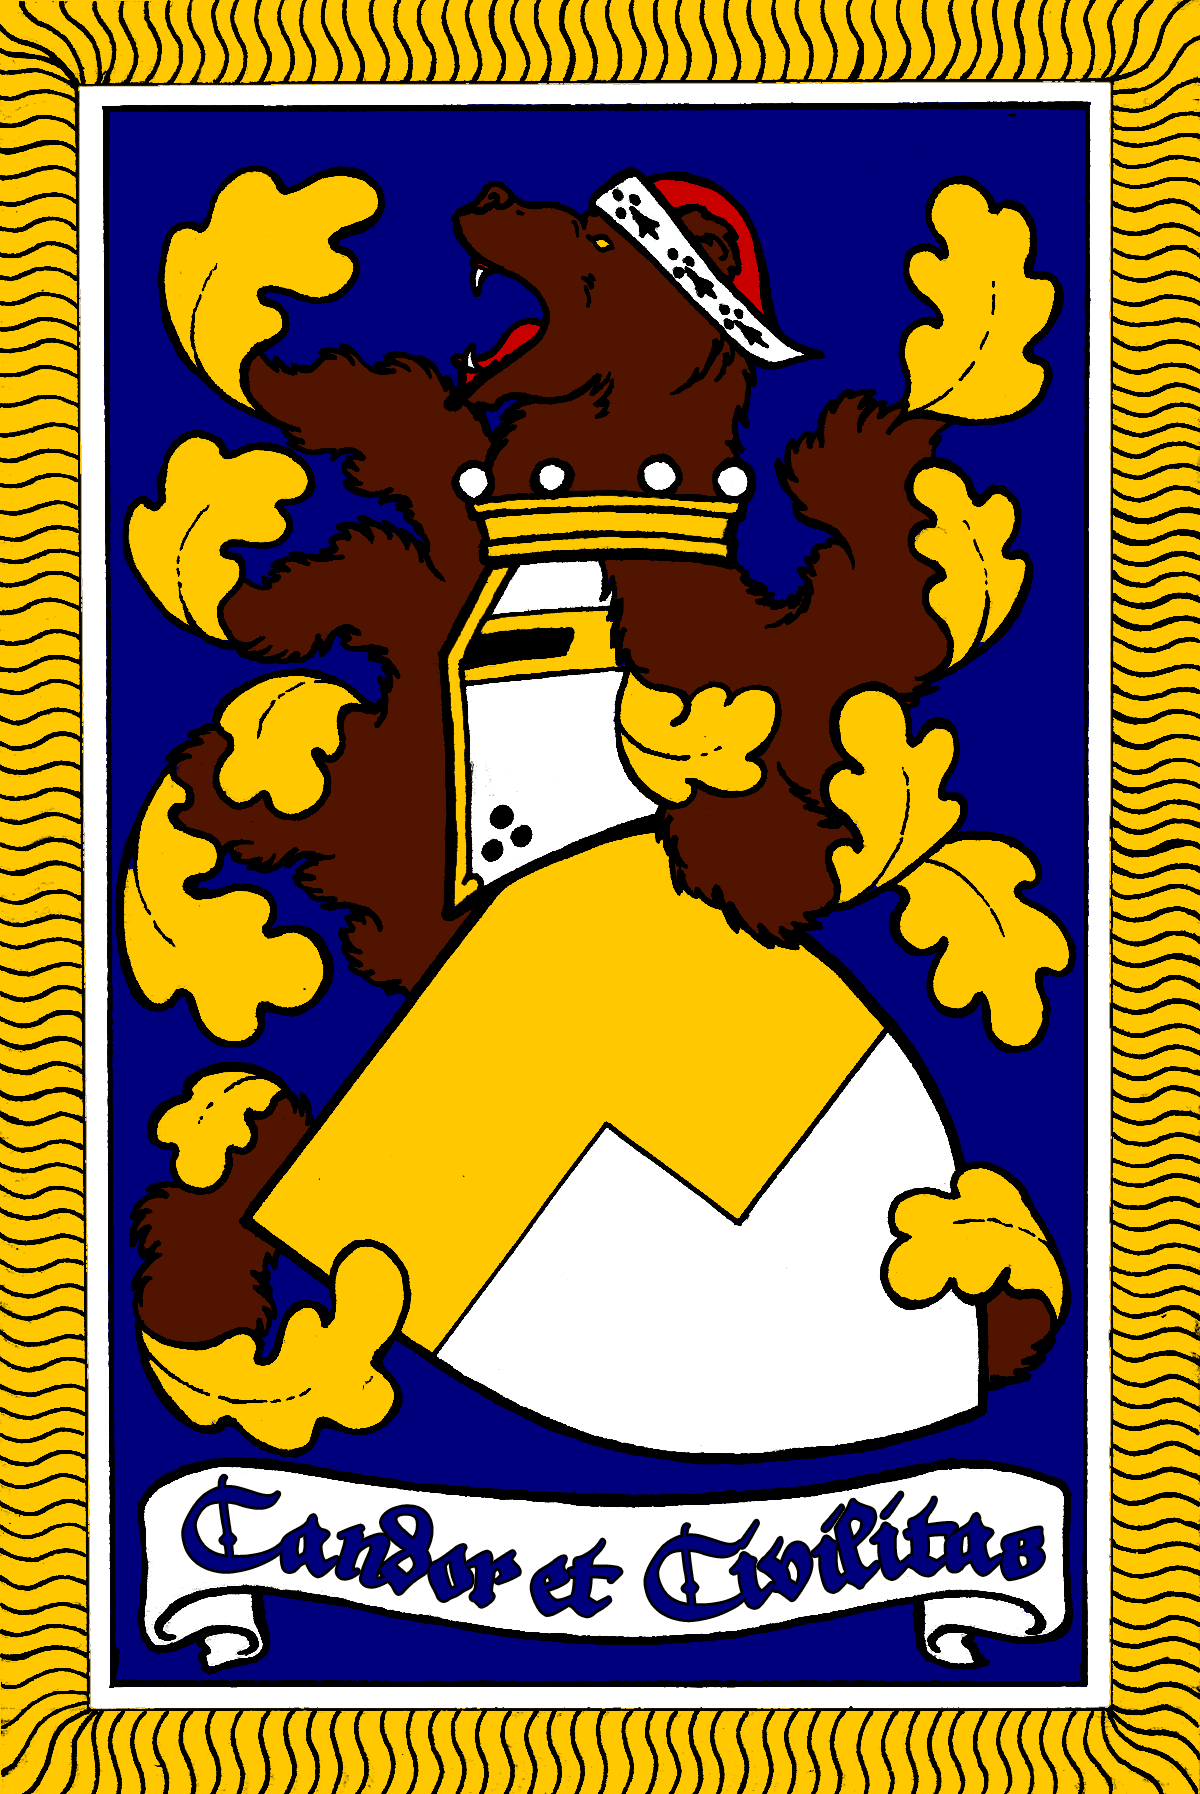
Stall plate art
Template
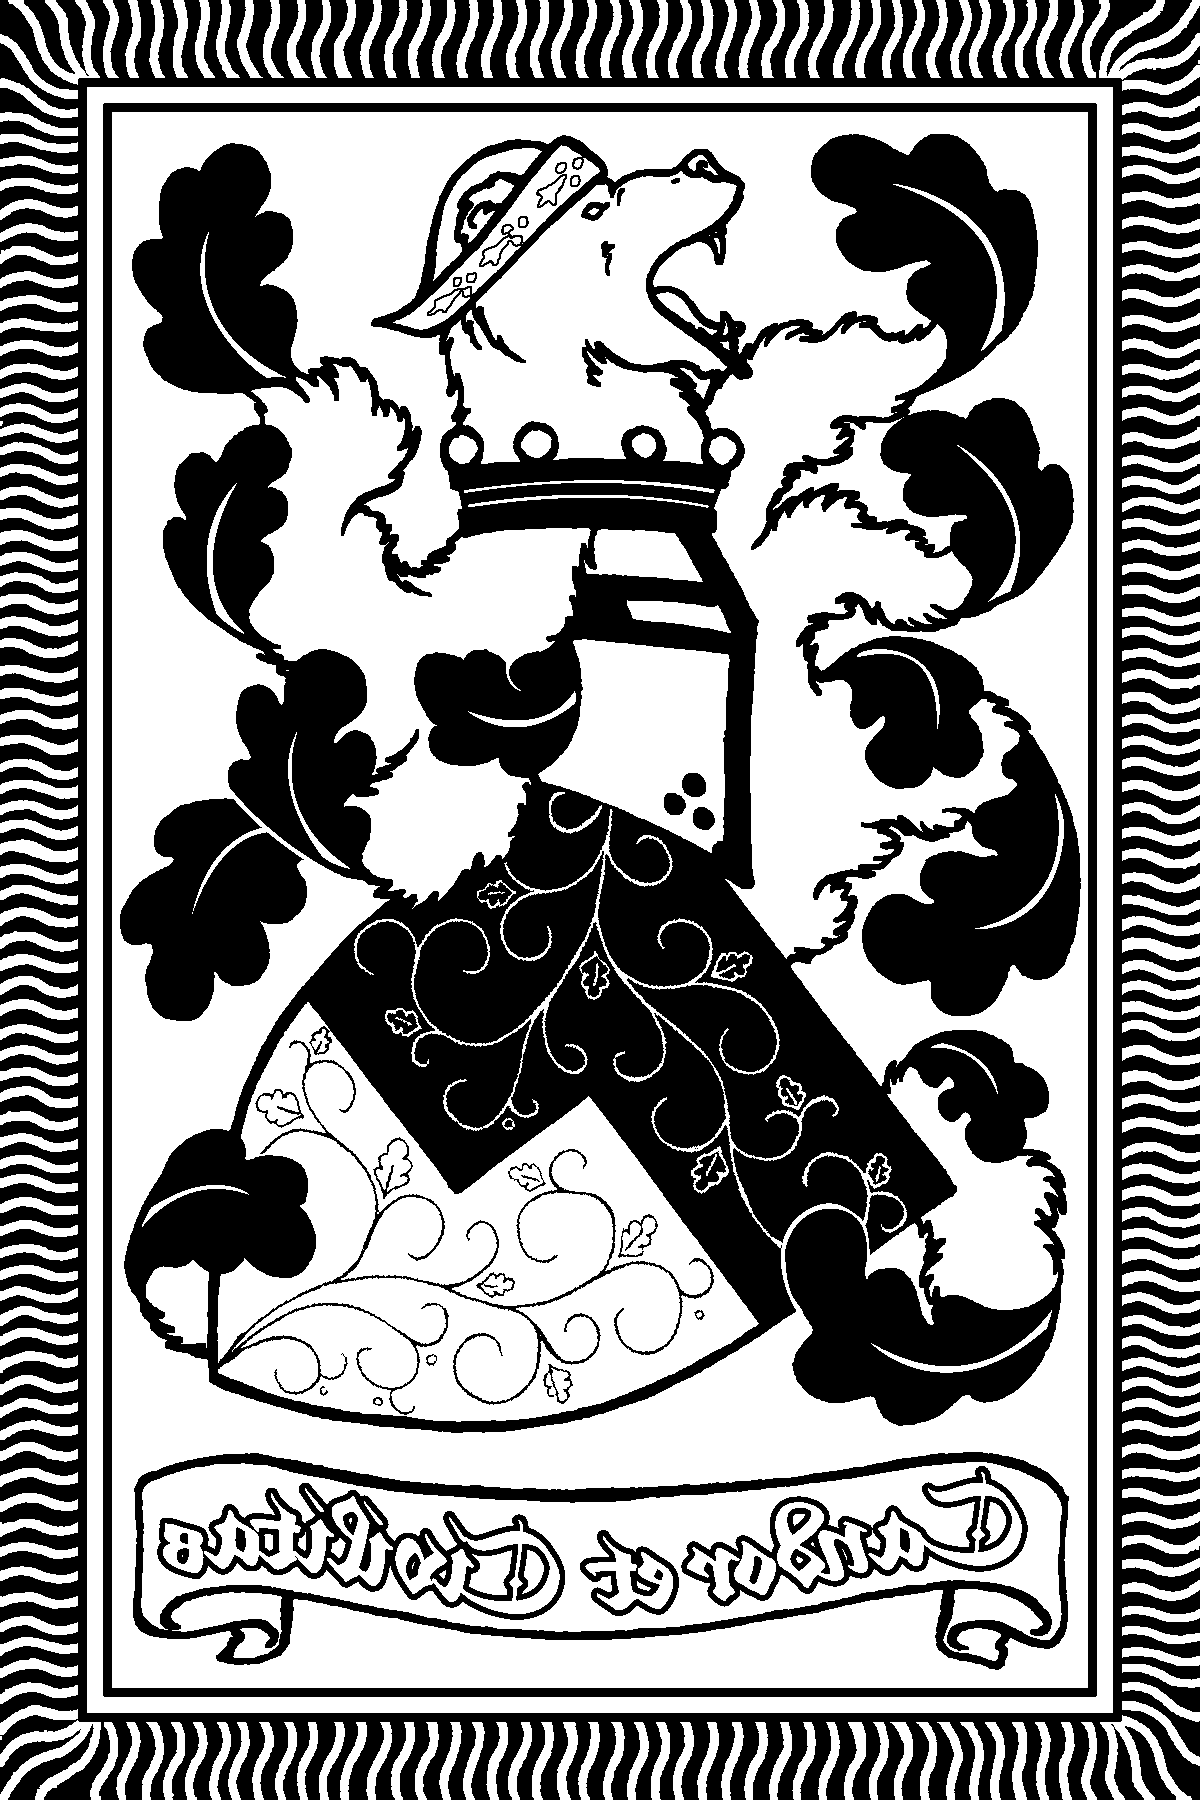
Template reversed with diapering
The first step in the etching process is acquiring artwork to etch. The art itself must be a clean black-and-white image for etching purposes, where the white space will be etched away and the black will be raised. There are plenty of period woodcut designs online that have fun details and nice clean edges, which I’ve used on several occasions. Scans of coloring books and other similar line drawings are also good sources of artwork.
However, what I had planned for this project was a heraldic achievement, which required at least some artwork specifically for me. As I am not myself any good at drawing, I commissioned my household’s resident artist, Tiarna Ciothruadh Dubh, to draw a stall plate in a standard size found in period examples, 4″x6″ including “fringed” edge.
The design incorporates my arms, as well as two of my registered badges ((Fieldless) A brown bear’s head erased proper and (Fieldless) An oak leaf Or), and Caidan-custom achievement elements that show that I am an armiger (helm and mantling), grant-bearer (crest), Court Baron (coronet around helm) and Pelican (cap of maintenance on the bear).
The helm is similar to some stall plate examples of the 1390s, because I think the frog helms of the 1400s plates look weird. In the collection of Garter stall plates from 1420-1421, there are a few with feathered crests (griffins and swans) where the feathering extends into the mantling. I wanted to emulate that with the bear’s head badge, so the mantling appears to be made of fur. The motto, “Candor et Civilitas” (Honesty and Courtesy), appears on a scroll, emulating Sir John Grey’s plate, and the whole is surrounded by a fringe design similar to the sample images above.
The artwork I received was a hand-drawn black-and-white line drawing that had been scanned. I spent a day meticulously going through every square inch to make sure that the lines were clean and crisp. I then worked out which parts of the artwork would be solid gold in the final design, and filled those in with black.
After a few attempts to to etch this design (and a few more experiments with another image that had finer lines and more details) I went back and modified the stall plate artwork, adding a diapered pattern drawn by Lady Ariana verch Gwenllian to the escutcheon. The artwork you see on the right is the template I used for the plate in this tutorial, reversed and ready to print.
Materials:
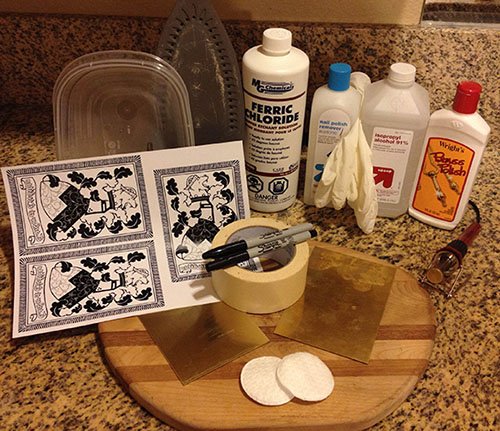
Fig 1: The Poore House brass etching kit comes with everything you see here, and is part of a balanced breakfast.
- 20 gauge brass plate, 4″x6″, good condition
- another brass plate, similarly sized, for ironing
- ferric chloride/PCB etchant solution
- glossy presentation paper with art printed on laserjet printer
- sealable plastic container slightly larger than the plate
- acetone/nail polish remover
- rubbing alcohol
- brass polish
- cotton pads
- latex/nitrite gloves
- Sharpie permanent markers
- wooden cutting board or similar surface
- iron
- masking tape
- pyrography stylus (optional)
Prepare your brass
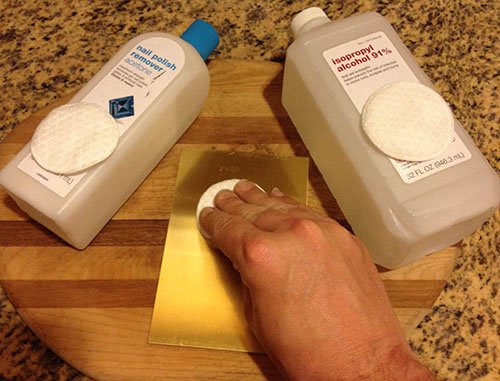
Fig 2: Clean your brass with care.
And chemicals.
While the quality of each brass plate is different, generally you’re going to want to find a plate that isn’t gouged or dented, and is largely free of scratches. Hobby brass tends to come individually wrapped in plastic, but the weight and sturdiness wasn’t to my liking for this project. I went to Industrial Metal Supply and had a 4″x6″ plate cut from a 20-gauge sheet of brass that was coated on one side with a protective plastic sheet that kept it smooth.
However, no matter how clean your brass may appear, it can always be cleaner. Thoroughly wipe down the surface you wish to etch with a cotton pat soaked in acetone. This strips any coating that might be on the brass, including lacquer. Once you’re done with the acetone, repeat the process with rubbing alcohol for a fully cleaned surface (Fig. 2).
Attach the artwork to the brass
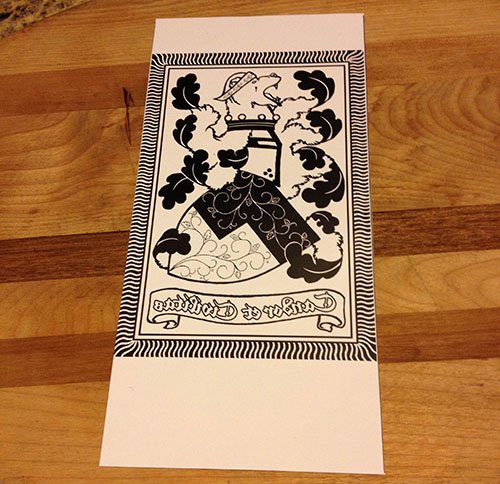
Fig. 3.
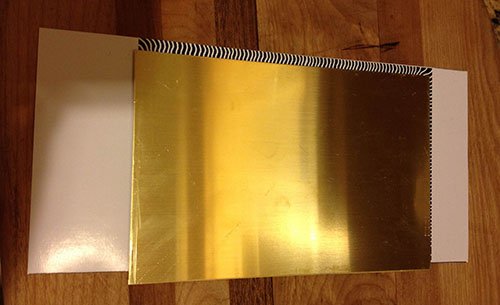
Fig. 4
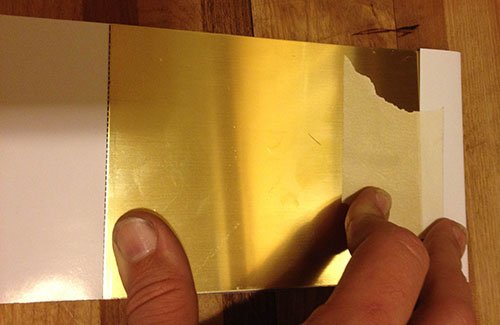
Fig. 5
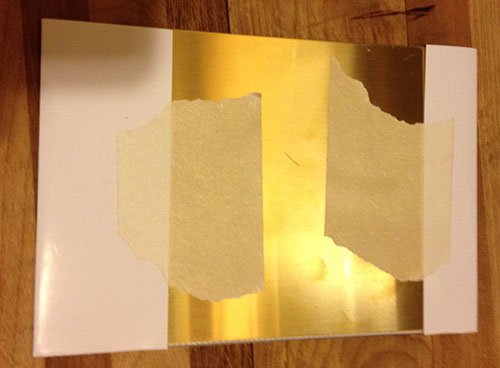
Fig. 6
There are a number of ways to prepare artwork, but the way that works best for me is a printout of the artwork in black and white on glossy paper with a laserjet printer. Each of these elements is important. A clean image will more clearly transfer onto the brass and be easier to check. Laserjet toner is heat-reactive, and will fuse to the metal in the next step in ways that inkjet toner will not. Glossy paper will release the toner more readily than matte, and regular-weight paper is thick enough to work with but thin enough to easily remove.
The paper I use is Hewlett-Packard 32 lb. laser glossy presentation paper. I prepare my artwork at 300 dpi for a good, clean image.
Paper likes to move around a bit when you hit it with an iron, and that can affect the transfer of the artwork, so I like to tape my piece in place prior to ironing.
Cut the paper to fit on two sides (Fig. 3), then align the plate to the artwork, face down (Fig. 4). Wrap the loose edges (Fig. 5, Fig. 6) and tape them to the back of the plate. The paper should be tight and smooth against the face of the brass.
Iron the brass
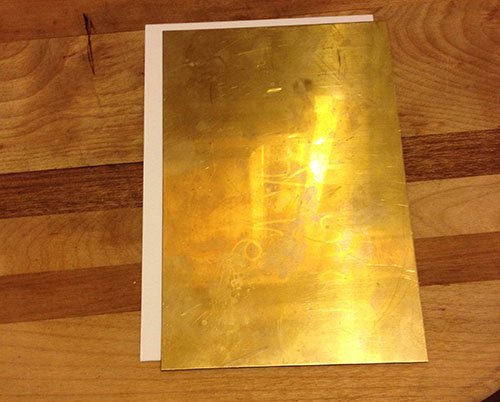
Fig. 7
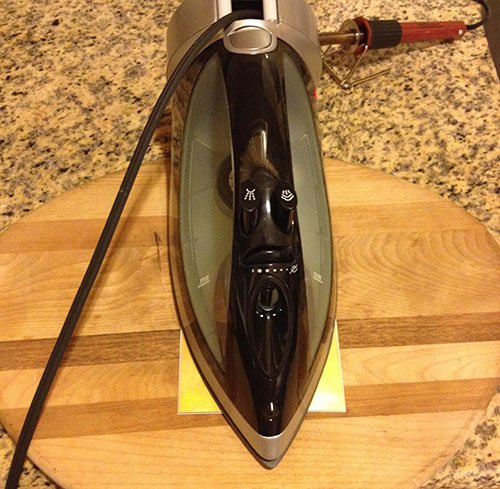
Fig. 8
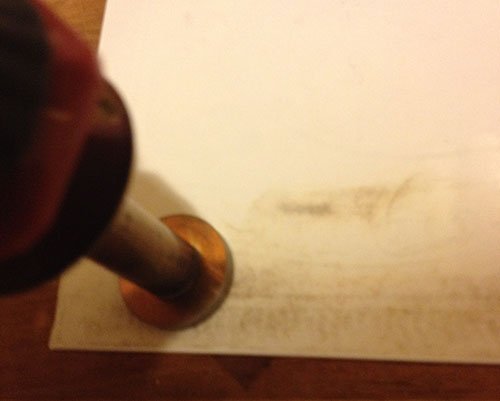
Fig. 9

Fig. 10
Transferring the toner cleanly and consistently to the brass is tricky, and it takes some practice. The toner must be heated so that it can fuse to the brass, and every square inch of the art has to be pressed. This is my method for doing so.
I use an iron devoted exclusively to this task, as the surface of the iron will get scratched. I also use an extra brass plate to heat and press the art throughout.
Place the main plate face-up on a wooden surface. Place the spare plate over it (Fig. 7). Let the iron pre-heat at its highest setting, then place it on the spare plate. DO NOT USE A STEAM SETTING. Let it sit for a couple of minutes, heating the plates (Fig. 8). Press for 30 seconds, then remove the spare plate. Starting on one end, move slowly and thoroughly back and forth, pressing the art with either the iron or the pyrography stylus (Fig. 9). The edges of the artwork are more likely to be missed, so give them special attention.
As the toner fuses to the brass, the art should start to show through the paper (Fig. 10). There may also be some discoloration or scorching on the paper. Use this to keep track of your progress.
Replace the spare plate and reheat as necessary. Take your time and be thorough. Patience and attention to detail in this step will make or break your final piece, especially if you have few drawing skills, like me.
Once you’re satisfied that the artwork is as pressed to the metal as it can possibly be, turn off your iron and stylus, and let everything cool for about 5 minutes.
Remove the paper

Fig. 11
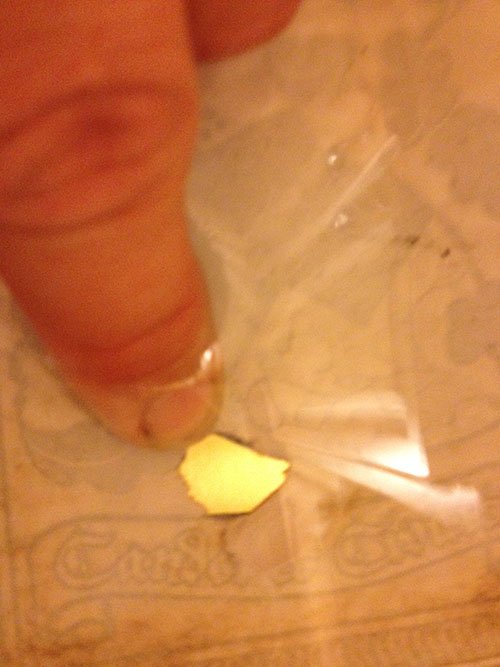
Fig. 12
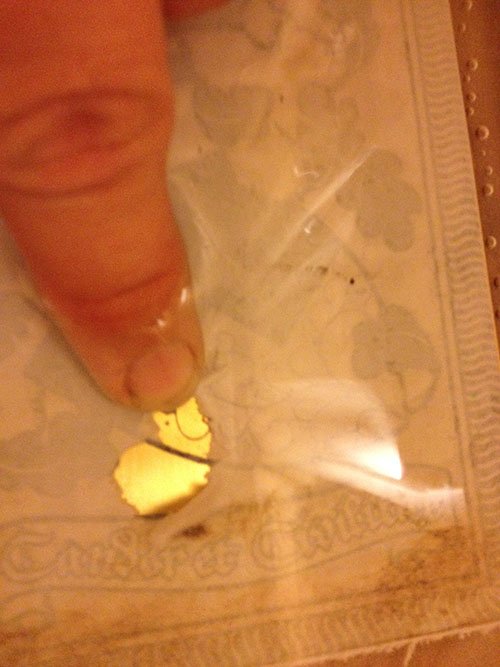
Fig. 13
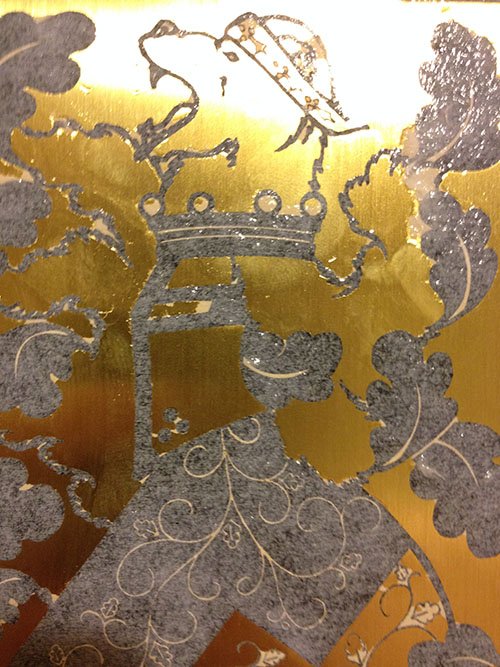
Fig. 14
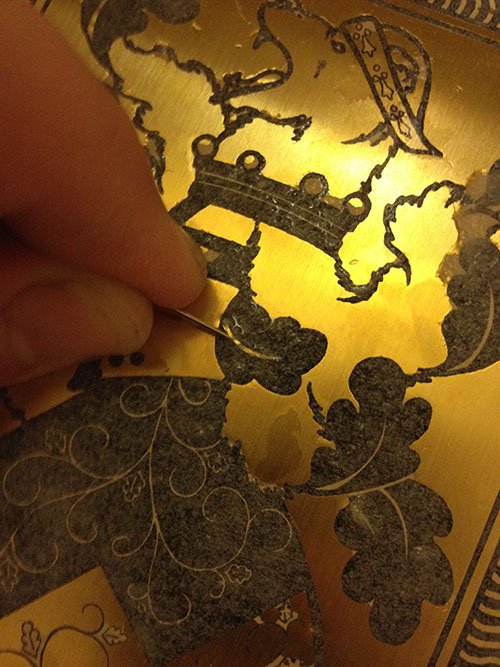
Fig. 15
Now that the toner has fused to the brass, it’s time to remove the glossy paper. Once the plate has cooled, fill your plastic container with cool water. Place the plate in the container, completely submerged in water (Fig. 11). Let the plate sit for another 3-5 minutes for the water to soak through the paper and soften it up.
After the plate has soaked for a while, find a spot with little to no toner. Rub with your finger until the paper starts to tear away (Fig. 12). Continue rubbing gently while the paper is submerged until you begin to expose the toner (Fig. 13). As above, take your time, be gentle, and continue rubbing thoroughly until you have exposed the whole plate (Fig. 14).
There will be little white bits of paper with no toner underneath that will try to cling to the small details of the artwork. If you let them sit, they will affect how the etchant contacts the brass. For a consistent image, it’s best to remove these small bits, leaving only the toner underneath. You can do most of this through continued rubbing, but some detailed designs are more recalcitrant. I’ve found that it’s best to remove these small bits with the point of a pin (Fig. 15), or another other small, thin tool, like a dentist’s pick.
It’s entirely likely that your artwork didn’t transfer to the brass entirely, and that some toner may have come off with the paper. There were definitely times when I was disappointed to see large bits of my printout peel away with the paper during this step. If this happens, you have two choices, based on the severity of the missing artwork. If the artwork is completely unsalvagable, you can start over completely. Accetone will remove all of the toner, though it will take a few passes. Scrub the plate thoroughly as above, then try again.
If the artwork is missing only a few details, and you are confident that you can apply them by hand, then you can add them in using Sharpie in the next step.
Reinforce the Toner
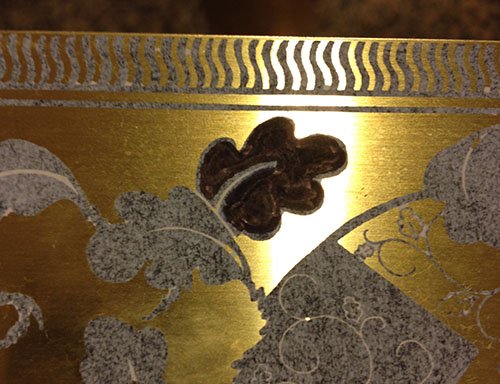
Fig. 16
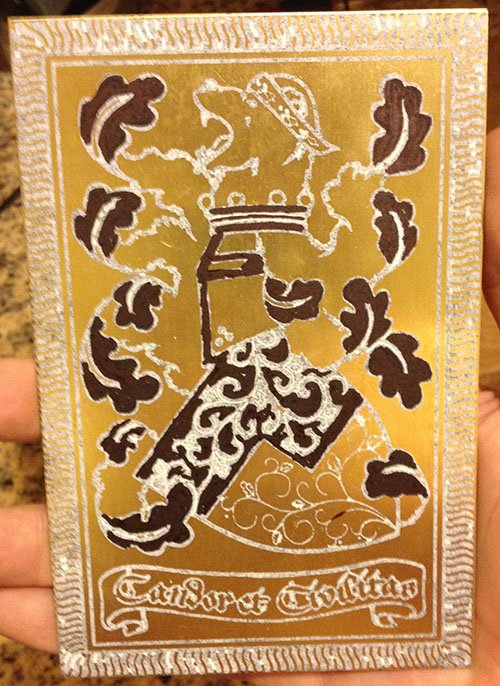
Fig. 17
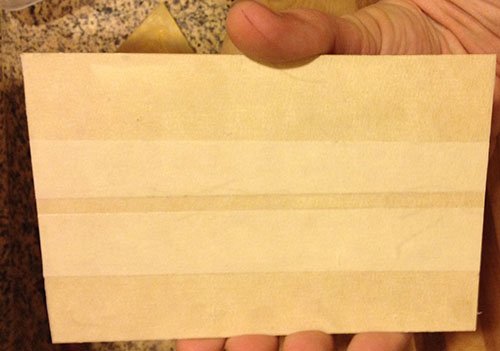
Fig. 18
Laserjet toner is fantastic for small details, but is notorious for not cleanly masking large fields. As such, it’s a good practice to reinforce the toner with Sharpie permanent markers for any patches that are thicker than a line (Fig. 16). Sharpie may also be used as a resist in its own right, so if there are lines or patches missing from the transfer procedure above, fill them in with your marker.
This is also good knowledge if you’d prefer to do all of your art by hand, rather than printing on a computer, and I regularly teach an introduction to brass etching using small brass discs and Sharpies. But I digress.
Be sure to use permanent markers, not Sharpie pens. The pens will not act as a resist, and will smear and wash away during the etching process.
Work through your artwork carefully, making sure you’ve reinforced every field, and recovered every line (Fig. 17). Once the brass is in the etchant, it will be too late to fix the art. If you make a mistake that you can’t fix with the Sharpie, take the time to wipe the plate clean with acetone and start again.
Finally, mask the back of the plate with wide masking tape, making sure to overlap the tape to ensure coverage (Fig. 18). Make sure the tape is fully pressed against the brass, especially where the tape overlaps. Failure to get a good seal will result in the etchant finding its way between the tape and the plate, and eating away at the back of your brass. Many of my first attempts had racing stripes down the center of the brass where the etchant seeped in between the two layers of tape. If you’re mounting this plate to something, like a box or a book cover, this is less of an issue. If, however, you wish to display it as a free-standing piece, this might be a much graver concern.
Etch the brass
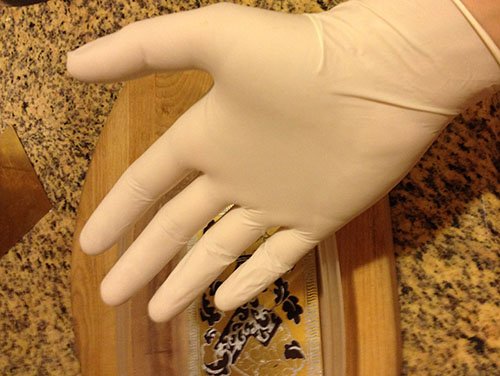
Fig. 19: Safety first!
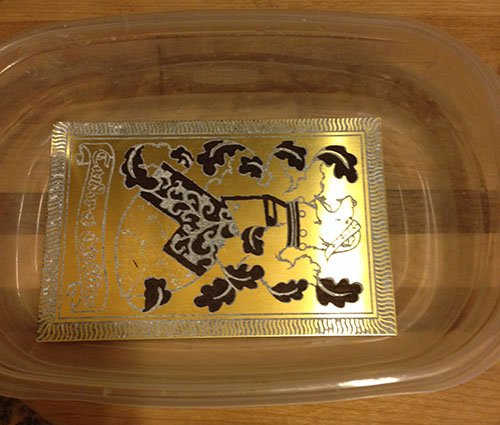
Fig. 20
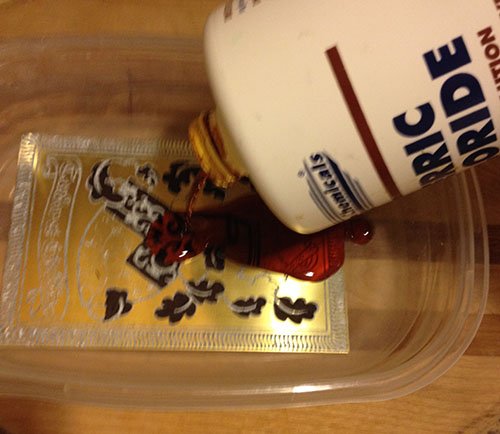
Fig. 21
Fig. 22: I see you baby!
Shakin’ that brass!
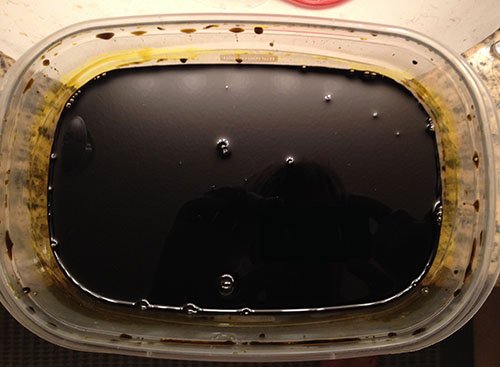
Fig. 23
Before we get to this next step, let’s stop to talk about etching solution. The etchant that I use is a ferric chloride solution used to make print circuit boards. My first source for this was Radio Shack, who sells it in small bottles under their own label. However, I soon found that it was more economical and (for me, at least) convenient to buy larger bottles of MG Chemicals Ferric Chloride at Fry’s Electronics, who carries. I also found that the latter solution gives a better etch than Radio Shack’s product.
Ferric chloride is a toxic chemical that will corrode metal and organic material, and stain pretty much everything it comes in contact with. Use it only in a well ventilated area, and always wear gloves (Fig. 19). Trust me; you don’t want any of this etching solution on your skin!
Protip: while you only need to have the gloves on for the actual etching process, leave them on until the end of this tutorial, to keep toner and brass polish off your fingers.
Place your plate in a plastic container, slightly larger than the plate itself (Fig. 20). Use a sealable plastic container, like a Tupperware box. Now open your bottle of etchant. Pour the etchant over the plate, (Fig. 21) filling the container until the plate is completely submerged. Put the lid on your container and make sure that it’s completely sealed. Set a timer for the amount of time that you want to etch the brass; I’ve found that 30 minutes gives a good, deep etch.
Now shake the container (Fig. 22) to agitate the etchant and keep it moving across the surface of the brass. This agitation keeps the bits of copper that have been eaten away by the etchant from settling on the surface of the brass and hindering the etching process. There are a couple of different techniques that you can use; vigorous, short movements back and forth; a slow, deep rocking, allowing the etchant to drain almost completely off of the brass before tilting the other way; a swirling motion; and so forth. It has been suggested to me by those who know to set the container on a running clothes dryer, but I’ve never tried it.
As the etchant reacts with the brass, he liquid turns dark rather quickly (Fig. 23), going from a coffee color to a rather nasty-looking yellow-black.
Rinse

Fig. 24
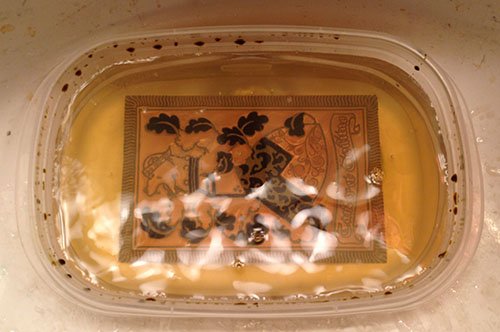
Fig. 25
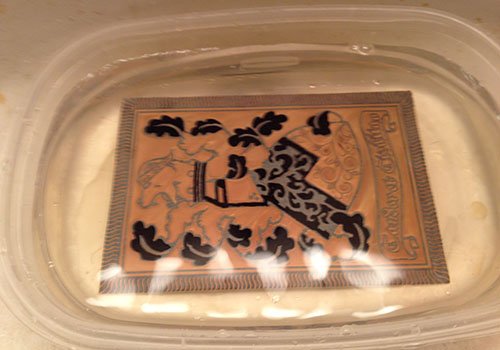
Fig. 26
Once your timer goes off, it’s time to remove the plate from the etchant bathbath. If you have multiple pieces that you are etching in a large bath, then it is more economical to leave the etchant in the container and remove the plate. However, for this project it makes more sense to remove the etchant and leave the plate.
Carefully pour the etchant into a separate plastic container (I use an empty etchant bottle) for disposal or re-use. This should leave you with a plate and a container covered in etchant (Fig. 24).
In a sink that can get a little dirty, place the container in the sink and fill it half-full with cool water (Fig. 25). Let sit for 20-30 seconds, then empty the water down the drain and fill the container again. Keep rinsing until the water is clear (Fig. 26). Be sure to wipe down the sink to get rid of any spots of water with etchant in them; they will leave stains if not cleaned promptly.
Remove the resist
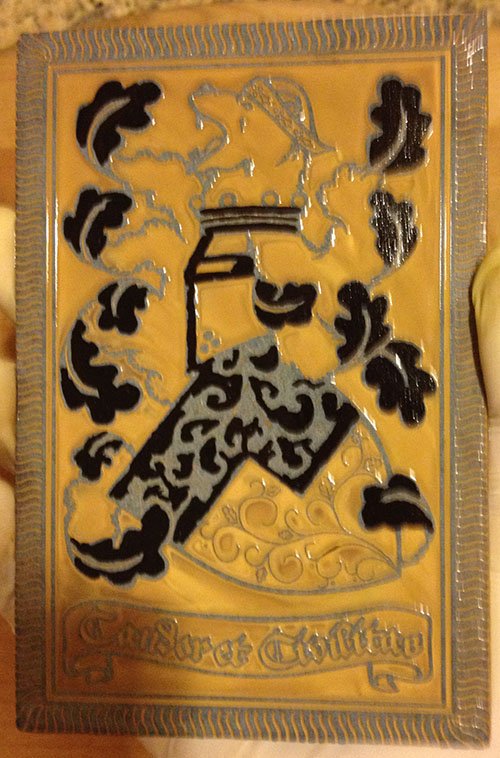
Fig. 27

Fig. 28
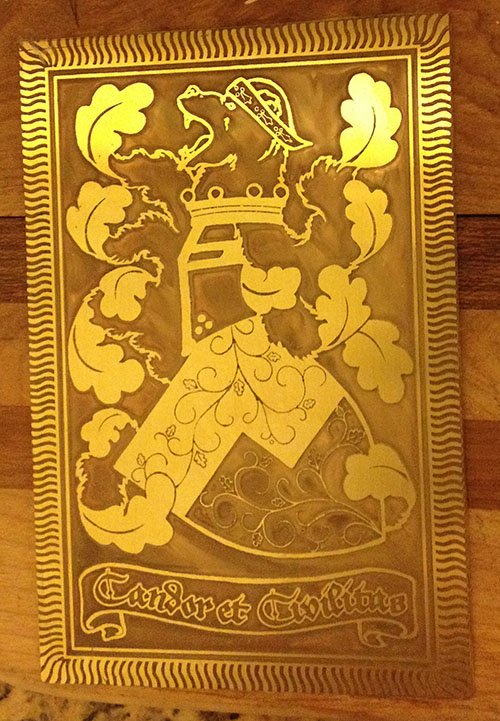
Fig. 29
You now have an etched brass plate that has ceased etching (Fig. 27). The next step is to remove the resist. As mentioned above, acetone will remove nearly any resist, including Sharpie and laserjet toner. Soak a cotton pad with acetone, and wipe at the resist to remove it (Fig. 28).
If there are any parts of the artwork where the toner or Sharpie did not completely resist the etchant, they will start to show up as you wipe the toner away, and will appear as small pits or gouges. This can be devastating, if you were going for a completely clean etch and a mirror finish. This is also the reality of etching: you *will* have imperfect pieces.
Fortunately, brass is fairly inexpensive, and most people won’t notice the imperfections when you put your “rough draft” out on display for demonstration purposes. I have six rough drafts of just the stall plate design, from the time that I started experimenting with electrolytic etching through my decision to add in the diapering. I keep a couple in my bag to show people, and I don’t have to worry about whether they get scratched up by keys or other items.
Once you’ve removed the toner, your plate’s raised edges should be just as shiny as they were before you applied the artwork (Fig. 29).
While the etching chemical reaction was stopped by rinsing, there is still some oxidation that occurs. If you observe your plate over the course of the next day or so, you will find that the etched portions will darken fairly quickly, depending on environmental circumstances. This is largely due to the residue that’s left from the etching process.
Polish
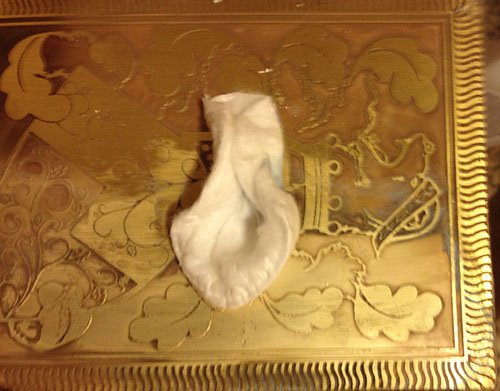
Fig. 30
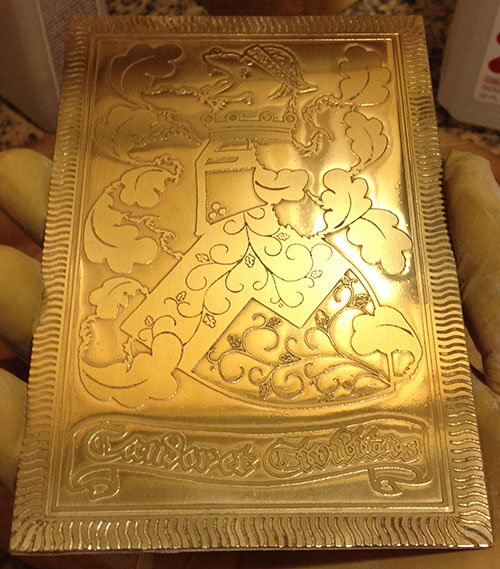
Fig. 31
To remove the residue in the recesses of the plate, use a gentle brass polish. Some polishes are very abrasive, and will leave lines in your design; test your polish before you use it for the first time.
Apply the polish to a cotton pad, and then polish the plate following the grain of the brass (Fig. 30). For some small, stubborn details, apply the polish directly to the area, and work with a soft toothbrush. Afterward, wipe the plate with a soft rag to remove the excess polish. Your plate is now polished and ready for display (Fig. 31) or for enameling…but that’s a project for another time.